
I once peeled an entire backyard lawn up off the ground like a bath mat. It was a DIY synthetic turf job, barely eighteen months old, and the owner couldn’t work out why it looked so tired when the product was rated to last fifteen years. I crouched at the edge, grabbed a fistful of grass, and pulled. A ripple ran across the whole lawn like a wave moving under a bedsheet. That told me everything before I’d dug a single hole.
The base underneath was actually fine. Compacted, draining, level. The grass itself was a decent mid-range product. What was missing was the part nobody photographs, and nobody brags about at a barbecue: the sand.
Most people arrive here the same way, worn down by a real lawn where even the trade-offs between kikuyu and buffalo grass come down to how much mowing and watering they’re willing to sign up for. Then they switch, pour the budget into the grass, and skip the cheap step that decides everything.
Here’s the uncomfortable truth about fake lawns. The blades you agonise over barely matter next to the two layers you’ll never see again once the job is done. A synthetic lawn is judged by its grass and built by its sand. Skip the infill, and you haven’t saved yourself a step. You’ve removed the skeleton.
The Lawn Lives or Dies Underground
Before sand even enters the conversation, the ground has to be right. Most failed lawns I get called out to didn’t fail because someone bought cheap grass. They failed because someone laid beautiful grass straight over dirt, or over a base they “sort of” compacted by walking on it in work boots.
A real base is boring, and that’s the point. You strip the existing surface down a few inches, lay a crushed-rock road base, screed it dead level, then run a plate compactor over it. You water it, then compact it again. The goal is a surface that drains in heavy rain and won’t shift under foot traffic for a decade.
Why does this come first in an article about sand? Because the sand and the grass can only ever be as good as the thing beneath them. If the foundation moves, nothing on top of it stays flat. Pour your effort into a base nobody will ever see, and you’ve already won half the job.
What That Sand Is Actually Doing Up There
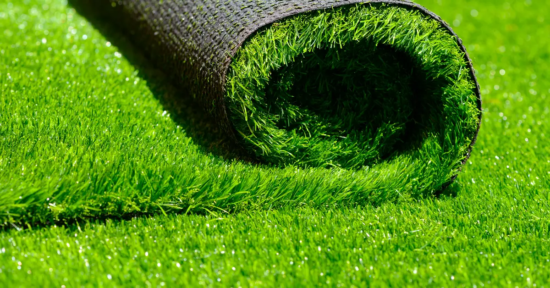
Once the turf is rolled out and the seams are joined, you brush the fibres upright and spread a fine, dry silica sand across the surface, then work it all the way down to the base of the blades with a power broom. People watch this happen and assume it’s cosmetic. A nice finishing touch. It is the single most important thing in the whole installation.
The infill does four jobs at once. It weighs the lawn down so it lies flat and won’t creep or lift. It holds each blade standing upright, so the surface reads full and plush instead of laid-over and matted. It buries and shields the backing and stitching from UV and the constant pressure of feet. And it adds thermal mass, so the surface runs noticeably cooler when the sun’s on it.
Think of it the way you’d think of ballast in a ship. Invisible, heavy, and the only reason the thing sits properly in the water.
I watched this clip for a homeowner once during the brushing stage. Before infill, his new lawn looked thin and slightly limp, and he was visibly worried he’d bought the wrong product. We ran the power broom through it and fed the sand down between the fibres. The blades stood up. The colour deepened. The whole surface changed posture in front of him, like a haircut after a wash. Same grass. Completely different lawn.
The grass is the costume. The sand is the posture.
Skip It, and Here’s Exactly How It Falls Apart
This is the part the search engines keep getting asked, so let me answer it plainly. When you leave the infill out, the lawn doesn’t fail dramatically on day one. It fails quietly, over the first summer or two, in five predictable ways:
- It ripples and wrinkles. With no weight pinning it, the turf expands in heat and has nowhere to go, so it buckles into waves.
- The blades go flat. Unsupported fibres fold under foot traffic and stay folded, especially in the lanes people actually walk. That “matted doormat” look is missing infill, not cheap grass.
- It moves and lifts. Edges peel, the surface shifts underfoot, and seams start to show.
- It wears out faster. Every footstep crushes unsupported fibres straight into the backing instead of into a bed of sand, so the lawn ages years in months.
- It runs hot. No thermal mass means a surface you don’t want to stand on barefoot in January.
Here’s the same lawn, two ways:
| With proper infill | Without infill | |
| Surface | Flat, stable | Rippled, lifting |
| Blades | Standing, plush | Folded, matted |
| Underfoot in summer | Cooler | Noticeably hotter |
| Realistic lifespan | Full rated life | Tired in 1–2 years |
| Feel | Dense, “real” | Thin, springy |
The cruel part is the timing. Every one of these shows up in the first or second summer, right when the owner expected the lawn to be hitting its stride.
The Order of Operations That Separates a Lawn From a Doormat
Done properly, the sequence is simple. The trouble is that the two steps people are most tempted to rush are the two that decide everything.
- Excavate and clear the old surface.
- Lay and level the crushed-rock base.
- Compact it, water it, compact it again.
- Lay a weed barrier.
- Roll out the turf, let it settle, then trim and join the seams.
- Secure the perimeter with edging or nails so nothing creeps.
- Brush the fibres upright.
- Spread the infill sand and work it down with a power broom.
- Give it a final brush so the blades stand proud of the sand.
Notice which two steps I bolded. They’re the boring ones. Compaction and infill are the steps that get skipped when someone’s tired, the daylight’s going, and the lawn already “looks finished.” It looks finished because the grass is green. It isn’t finished until the sand is in it.
Not All Sand Is the Same, and Neither Is Your Lawn
The default for most lawns is a clean, dry, rounded silica sand, often kiln-dried so it flows freely down between the fibres instead of bridging on top. For homes with dogs, there are coated and antimicrobial infills that handle odour better. And the taller your turf’s pile, the more infill it needs, because longer blades have more length to support.
What you don’t want is builder’s sand or play sand grabbed from the hardware aisle. It clumps, holds moisture, and sits in the fibres like wet cement instead of flowing to the base.
This is the point where DIYers guess, and professionals don’t. Matching the infill type and the application rate to your specific turf and how the space gets used is the difference between a lawn that performs and one that merely looks okay on install day. If you want to see how that’s actually specced, a professional turf supplier like A View Turf lays out infill and pile-height details by product, which beats eyeballing it next to the paint section.
Getting this layer right is the cheapest insurance you’ll buy on the whole project.
One Last Thing
Next time someone shows off their new synthetic lawn, ignore the blades. Crouch down, take a handful at the edge, and give it a tug.
If nothing moves, you’re looking at a lawn that will still look like this in ten years. If a ripple runs across it, you already know exactly what they skipped.
